APRS Setup Anytone D878UV
APRS setup Anytone D878UV
First load your code plug into your Anytone CPS software
Now you need to go into your “Tools->Options” settings in your CPS software and be sure these three options are selected.
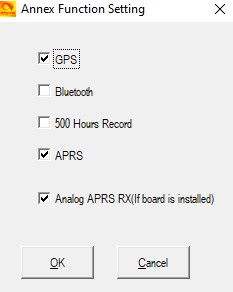
Hit “OK” to close the options settings. In your items on the left side of you CPS software, open “APRS”.
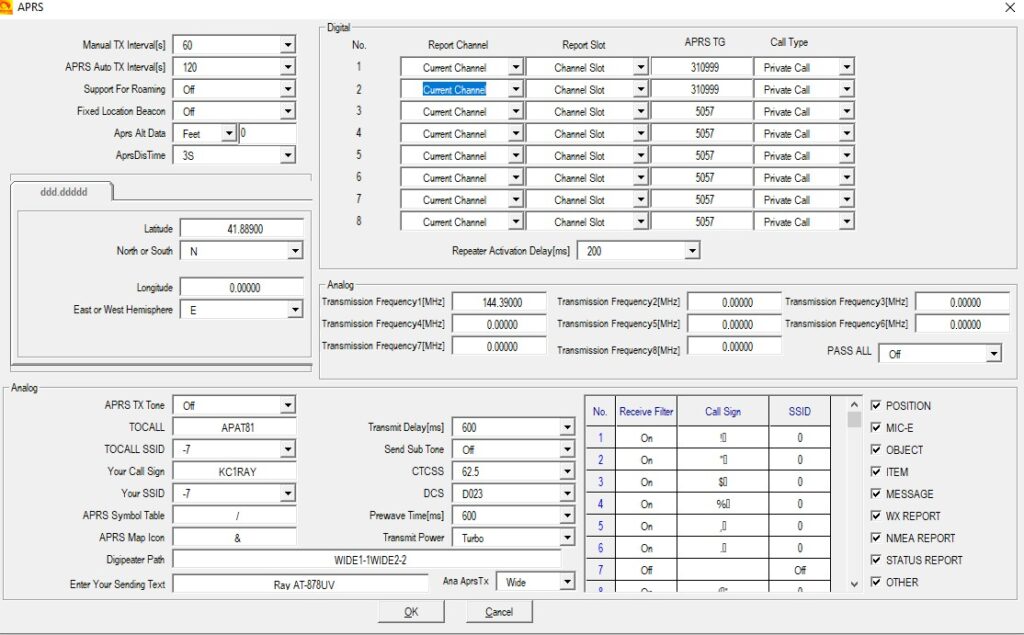
Main APRS setup Anytone D878UV
These are the APRS settings I use in my Anytone D878UV. Be sure to replace my call sign with your own. You can also change the “Enter Your Sending Text” with whatever you would like. In the “Digital” section with 8 “Report Channel”, you only have to setup channel 1. This assumes that all your digital channels will have the APRS option selected. The “APRS TG” for the USA is 310999.
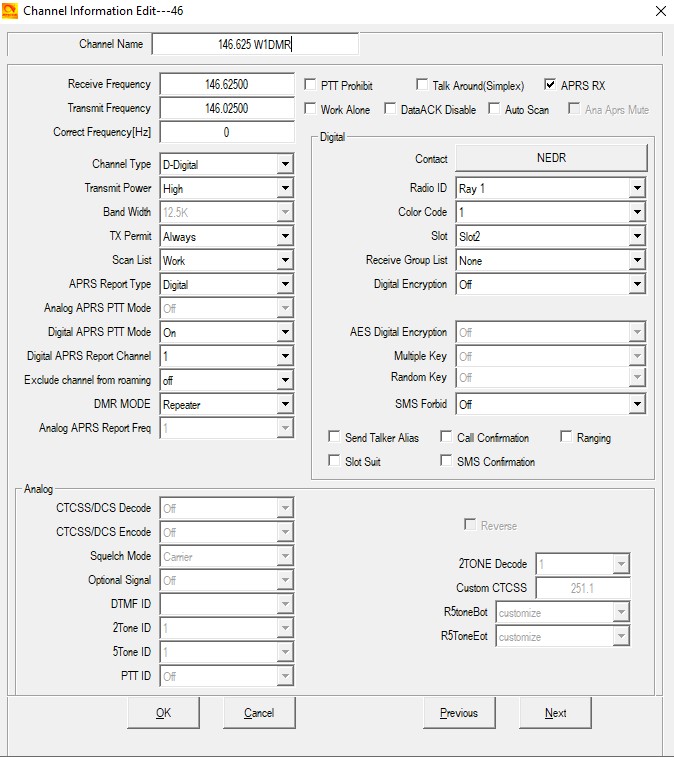
Digital APRS setup Anytone D878UV
Above is a typical digital channel I use in my Anytone 878 APRS setup. Make sure “APRS Report Type” is set to Digital and “Digital APRS Report Channel” is set to 1. Do this to all the digital channels you want to TX a APRS Report. Otherwise it is a typical digital channel.
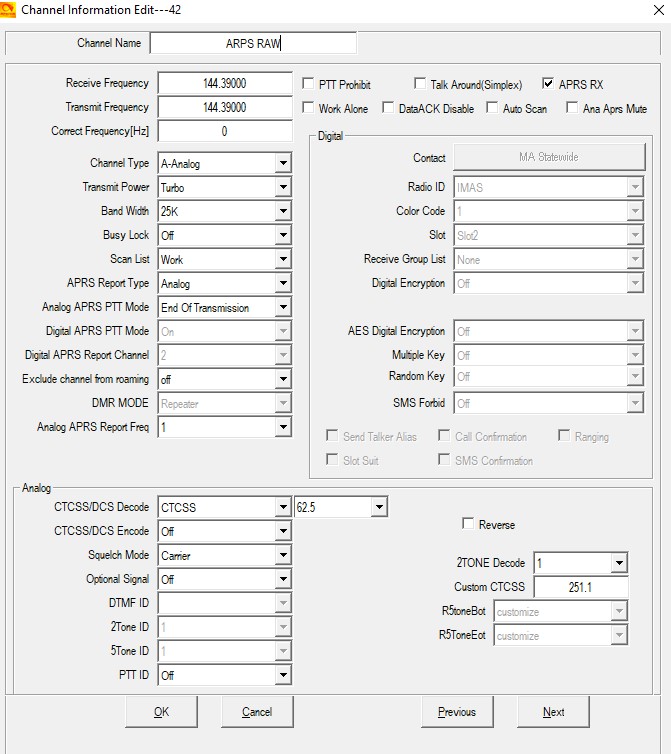
Analog APRS setup Anytone D878UV
Above is a typical analog channel, make sure “APRS Report Type” is set to analog, “Analog APRS PTT Mode” is set to “End of Transmission”. “Analog APRS Report Feq” is set to 1. Do this to any analog channels you want to use to send an APRS report when you PTT. 144.3900 is the analog frequency for analog APRS gateways. If you are not in range of a gateway your report will not go through.
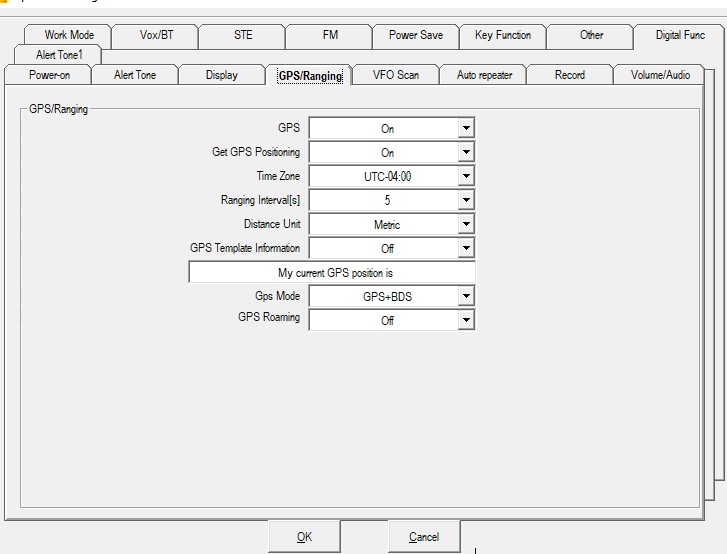
These are the GPS settings, Be sure GPS is on and “Get GPS Positioning” is on.
See what you can do with APRS now that your radio is setup. Visit aprs.org.